SAM for Emy : now with Keyboard support

Check this page for more : https://www.polaxis.be/product/sam-firmware/


Connect a USB keyboard and select Keyboard from the main menu.

  • Type text directly from the USB keyboard.
  • Press Enter to speak the current sentence with the current SAM settings.
  • Press Escape to clear the text buffer.
  • Use Backspace and Delete to edit the text.
  • Use the cursor keys to move inside the text.
  • Press Tab to append the current sentence to keyboard.txt on the SD card.


Talko Terminal

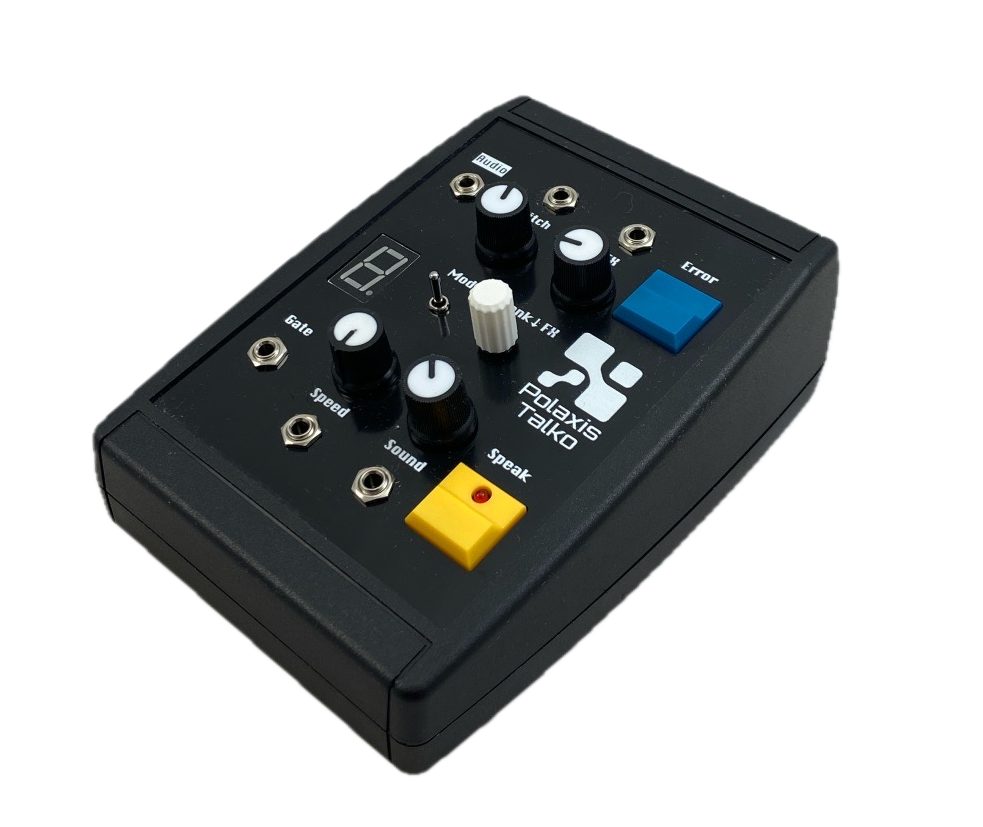
Talko Terminal is here.

After the success of Emy in the Terminal desktop format, Talko now comes in the same proven enclosure.

Inside, it’s the full Talko Eurorack module, offered as a standalone tabletop unit — USB-powered, compact, and perfect for anyone who wants Talko without a rack.

It runs the complete Talko2 engine: numbers, alphabets, phonemes, classic phrase banks, real-time pitch and speed control, plus the new Error mode for continuous glitch textures.

A 7-segment display shows the active bank or effect.

Talko Terminal includes a USB-C port for power, serial communication, and UF2 drag-and-drop firmware updates, making hacking and experimentation easy.

A key advantage over the Bricky version: you get direct USB access, so there’s no need to open the case to communicate with Talko or flash new firmware.


Aria Vowel generator

Aria Firmware – A Vowel Synth for Emy & Terminal 🎶🔊

Unlock new vocal textures with Aria, a playful and expressive vowel generator for your Emy or Terminal module.
Whether you’re crafting robotic chants, abstract soundscapes, or vocal-like modulations, Aria brings a fresh dimension to your synth setup.

Key Features:

Three Modes – Trigger, Gate, and Continuous for flexible control

Smooth Transitions – Adjust merge duration for seamless morphing

Customizable Parameters – Sample rate, pitch, noise level & more

Easy Installation – Load via SD card and switch firmware effortlessly

📥 Get Aria now for just €4.99 – includes future updates!

🔗 Add to Basket

View this post on Instagram


How to update or load a firmware on Kraftor ?


  • Open the plastic case by gently squeezing the top part and lifting it while holding the lower part.
  • Install your voice board
  • Connect Kraftor to your computer via USB.
  • Double-click on the reset button
  • A new drive named “KraftoBOOT” will show up on your computer, and the MIDI LED will start to glow gently
  • Drag the firmware ending with “.UF2” to the “KraftoBOOT” drive
  • Done! : Kraftor will restart using the newly installed firmware

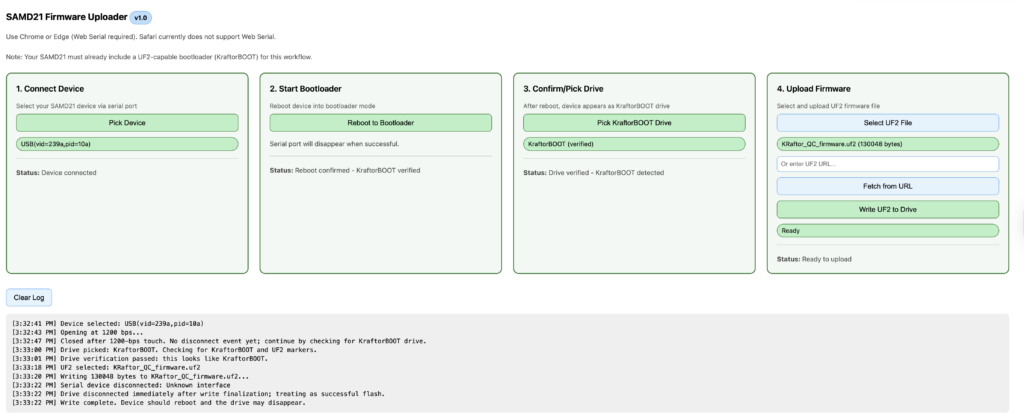
Kraftor uploader

If you just want to update the firmware without changing the voice board, you can also do everything remotely via USB without opening the case.
Use this small utility in your browser : 

You can run the utility one line here  https://deladriere.github.io/samd21_UF2_uploader/

or access the source code here :


Nexus firmware update

2 new exciting firmware Updates for Nexus!

Enhanced MIDI Functionality:

  • Text and Phoneme via MIDI: Send text or phonemes directly through MIDI.
  • Sequencer Integration: Pre-store phoneme or text sequences in your piano roll. Add a “Speak” note at the end to activate speech.
  • MIDI controls to adjust your Nexus device’s speech characteristics in realtime
  • 20k Word Library: Access a vast collection of pre-made MIDI words, ready to drag and drop into your favorite sequencer.

Phoneme Mode:

  • Simplified Selection: Easily choose from essential phoneme groups like “Vowels” and “Consonants.”
  • User-Friendly Controls: Straightforward pitch and speed adjustments, perfect for beginners in speech synthesis.
  • Simple Activation: Get started with just a gate signal.


Sino vox : now with keyboard input

Two updates to the Sino vox firmware :

  1. update : in  the number function, it is now possible to trigger the speech from the main button
  2. new: keyboard mode

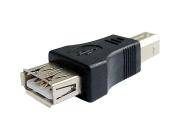
Connect a USB keyboard to the USB port using the gender changer adapter.

Do not use this port to power something apart from a standard keyboard.
The maximum current that can be provided is 300 mA.

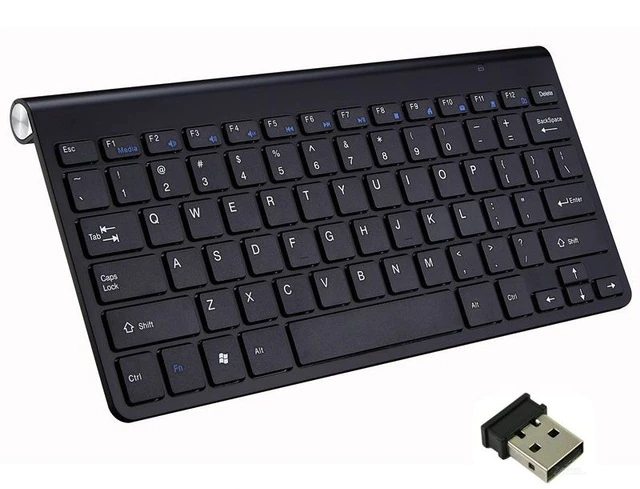
I you need a keyboard, check out this Wireless Keyboard.

Keyboard


​Text Operation:

Type the text and press Enter to start the speech. (The Function button is also active)
Use the Backspace to delete the last character.
Use Escape to erase the string and start over.

Use the five potentiometers to alter the Speed, Voice, Pitch, Volume, and Language (Pinyin or English)

The busy signal goes up while a key is pressed. (if you want to trigger external sounds, for example)

Firmware

more info in the user manual


How to update or load a firmware on Emy & Terminal ?

Option 1 ( requires the Emy version 2.1 or bigger to be installed first)

  • Download the firmware
  • Save it on the SD card with a name that makes sense to you (like “emy.bin” )
  • load it from the code>flash menu.
  • If changing the add-on vox :
    • switch the power off
    • install the add-on vox
    • re-apply power

Note This function simply

  • copies the firmware “blalbla.bin” to “firmware.bin”
  • reboots the system
  • deletes the firmware.bin
  • keeps the original with its name.

You can keep all the firmware on the microSD card and call them whenever you change the add-on vox

Note : Change the firmware before changing the add-on vox

Option 2

  • Download the firmware
  • Save the firmware exactly as “firmware.bin” on the SD card (and not “blabla.bin”)
  • Re-apply power


New text-to-speech module : Nexus vox


A truly remarkable pair of chips power up the Nexus vox.
These chipsets translate plain English text into speech in real time with complete dynamic control of the voice characteristics.

The TTS processor utilizes RC Systems’ DoubleTalk TTS technology, based on a patented voice concatenation technique using actual human voice samples.
Voice control parameters, such as speed, volume, tone, pitch, and expression, can also be embedded within the text stream for dynamic, on-the-fly voice control.
There is even a real-time reverb effect!

A serious competitor for the Vax vox module!

Say tuned for more demos…


SPO vox sustain allophones in phonetic files

Adding a duration marker to alter the normal duration of the allophone.
Here is the syntax to use in your .spo file : (add a + marker and the duration in milliseconds)

technology: \TT1 \EH +500 \KK1 \NN1 \AA +200 \LL \AX +200 \JH \IY
mathematics: \MM \AE \TH \AX \MM \AE \TT1 \IH \KK1 \S
spacecraft: \S \PP \EY \S \KK1 \RR2 \AE \FF \TT1
electronic: \IH \IH \LL \EH \KK1 \TT1 \RR2 \AA +200 \NN1 \IH +200 \KK1
electronic: \IH \IH \LL \EH +400 \KK1 \TT1 \RR2 \AA +800 \NN1 \IH +500 \KK1


SPO vox : reading phonetic files

SPO vox can read phonetics files from the microSD card.

Store your vocabulary in a text file and use “.SPO” for the extension

The structure of the file has to respect the following :

A label, followed by the allophone list, each separated by the \ character

1: \WW \AX \AX \NN1
2: \TT2 \UW2
3: \TH \RR1 \IY
4: \FF \FF \OR
5: \FF \FF \AY \VV
6: \SS \SS \IH \IH \PA3 \KK2 \SS
7: \SS \SS \EH \EH \VV \IH \NN1
8: \EY \PA3 \TT2
Empty line

Check the manual for the list of the supported allophones

📌 don't forget to add an empty line at the end of the file.

I also uploaded a dictionary of 130.000 words in phonetic format to get you started.

As usual, Emy sends the label over serial communication on the USB port. Here is another example where TouchDesigner is receiving the labels :

If you want to get started using TouchDesigner, also check this file

: all it does is connect to Emy and display the text on the screen