How to update Talko 2 and Teletype firmware

Update the firmware on an RP2040-based Talko 2 or Teletype from your browser using a ready-made .uf2 file. You do not need to compile the firmware or install a development environment.

Open the firmware uploader in desktop Chrome or Edge. Uploader documentation is also available.

What do I need?

A desktop computer running Chrome or Edge, a USB data cable, your device powered according to its normal setup, and a UF2 firmware file intended for that exact device and hardware version. Safari and Firefox do not support this uploader.

Use Talko 2 firmware for Talko 2 and Teletype firmware for Teletype. The uploader is shared, but the firmware files are not interchangeable. This guide covers the RP2040 models; do not assume it applies to an older Talko.

The firmware already on the device must support remote entry into its bootloader. That is what allows an update without reaching the internal BOOTSEL button. A blank board or firmware without this support needs the model’s manual bootloader procedure.

Where do I get the firmware?

Use the ready-made UF2 release supplied by Polaxis for your device. If it is supplied in a ZIP archive, extract the archive first and select the .uf2 file inside.

Talko 2: open the Talko 2 firmware download package and download the UF2 file. Sign in with your Polaxis customer account if prompted. The package currently lists version 1.3, Talko2_v1_3.uf2.

Teletype: the ready-made UF2 download link will be added here when available.

For Teletype source code and build instructions, the planned repository is TeleTypeController on GitHub. Building from source is optional.

How do I update?

  1. Connect the device to your computer with a USB data cable. Close serial monitors and any other application using its USB serial port.
  2. Open the firmware uploader in Chrome or Edge.
  3. Under 1. Connect Device, click Pick Device. Choose your device in the browser’s serial-port chooser.
  4. Under 2. Start Bootloader, click Reboot to Bootloader. The serial port disappears and a drive named RPI-RP2 should appear in Finder or File Explorer.
  5. Under 3. Confirm/Pick Drive, click Pick RPI-RP2 Drive. Select the RPI-RP2 drive itself, rather than a folder inside it, and allow the browser to write to it when prompted.
  6. Under 4. Upload Firmware, click Select UF2 File and choose the correct firmware file for your device.
  7. Click Write UF2 to Drive. Leave the USB connection and power in place while the file is written. The device normally restarts automatically, and the RPI-RP2 drive disappears.
  8. Wait for the device to restart, then check that it operates normally. For Teletype, reconnect in the configuration app to check the firmware version and saved mappings.

The device is not listed. What should I check?

Make sure you are using desktop Chrome or Edge and a data-capable USB cable. Try another USB port or cable, and close applications that may already have the serial port open. A charge-only cable can power a device without providing a data connection.

Why does the serial port disappear?

That is expected after Reboot to Bootloader. The device switches from its normal USB serial connection to the RPI-RP2 drive. Continue with Pick RPI-RP2 Drive.

The RPI-RP2 drive does not appear

Check Finder or File Explorer. If the device did not enter bootloader mode, its installed firmware may not support remote reboot. Follow the bootloader instructions for your exact model, or contact Polaxis for help. Once RPI-RP2 is available, you can select that drive in the uploader or copy the correct UF2 onto it manually.

The browser cannot write to the drive

Confirm that you selected RPI-RP2 and granted write access. On macOS, check System Settings → Privacy & Security → Files and Folders and allow Chrome or Edge access to removable volumes if that option is shown. If your computer is managed by an organisation, its permissions may restrict access.

Do I need to keep the uploader or configuration app open?

No. The uploader is only used to install firmware. Teletype’s configuration app is a separate tool for assigning notes, knob functions and MIDI channels. Save those settings on Teletype, then close the app and play. Saved settings are retained after power-off during normal use.

Will an update keep my settings?

Check the release notes for the firmware you are installing. Settings compatibility can change between versions, so note your current mappings or take a screenshot before updating. Check them again afterward.

Before publication: add the Teletype firmware download link and validate the full update procedure on Talko 2 and Teletype, including settings retention for the supplied releases.


Meet Teletype: hands-on MIDI control for Kraftor

Meet Teletype, a compact MIDI controller for playing synthetic voices with your hands. Five hinged keys trigger sounds and phrases, while four knobs let you shape the performance. It is designed as a companion for Kraftor, and also works with compatible MIDI instruments and software.

Blue Teletype MIDI controller beside Kraftor
Teletype with Kraftor. Kraftor is sold separately.

A small controller with room to play

Two bank switches give the five keys access to 20 note assignments. Set up one bank for phonemes, another for allophones or stored phrases, and use the knobs for parameters such as pitch, speed or modulation. The available sounds and controls depend on the voice board and firmware in your instrument.

Each knob can send a MIDI Control Change message or pitch bend. The keys and knobs have independent MIDI channels, so note triggers and continuous controls can address different parts of your setup. The keys send short triggers; holding a key does not sustain a note.

Configure once, then play

Open the Teletype browser interface in desktop Chrome or Edge to choose notes, knob assignments and MIDI channels. Apply your changes and save them on the controller. The settings survive power-off, and the interface is no longer needed once setup is complete.

For a hardware setup, power Teletype by USB and connect its Type B TRS MIDI output to your instrument with a suitable cable. You can perform without a computer. USB MIDI also lets Teletype control software, and the optional browser Monitor view shows incoming MIDI as you play.

Choose your colour

Teletype is available in red, beige, black, white, blue, green and orange. It weighs 160 g and ships from Belgium. The photos show the blue version.

The firmware source, documentation and ready-to-flash UF2 are available on GitHub. Firmware updates can be installed with the browser uploader, without compiling.

Explore Teletype and choose your colour →


Echo, the Polaxis serial terminal, is now online

Echo is now available directly in your browser.

Echo is a retro-styled serial terminal for connecting to Kraftor and other Polaxis devices over USB. Open it in Chrome, Edge, Brave, Opera, or another compatible Chromium-based desktop browser—no installation is required.

Echo browser-based serial terminal by Polaxis

Choose the baud rate and line ending, click Connect, and select your serial device.

Echo runs locally in your browser; serial communication is not sent to a server. The source code is available from the Source link inside Echo.


How to add the FRAM module to Kraftor

This guide explains how to retrofit the FRAM 1.0 module in a Kraftor. The module is installed on the underside of the main PCB, so the enclosure, optional speech board and display assembly must first be removed.

Before you start

  • Disconnect USB, power and every other cable from Kraftor.
  • Work on a clean, non-conductive surface and take normal anti-static precautions.
  • This retrofit requires careful soldering. If you are not comfortable soldering small electronics, ask a qualified technician to install the module.

What you need

  • FRAM 1.0 module
  • Small screwdriver suitable for the four PCB screws
  • Fine-tip soldering iron and electronics solder
  • Tweezers and a magnifier, if available

Installation

1. Open the Kraftor enclosure

Hold the lower part of the enclosure. Gently pinch both sides of the top cover to release the clips, then lift the cover away. Do not force the plastic.

Pinching both sides of the Kraftor top cover to release it
Pinch both sides of the top cover and lift it away.

2. Remove the speech board, if fitted

If a speech board is installed, carefully remove it and put it somewhere safe. The photos show a VaxVox board, but the same step applies to another compatible voice board. Handle the board by its edges.

Kraftor opened with the optional VaxVox speech board removed
Remove the optional speech board before continuing.

3. Lift the display assembly

Gently lift the display assembly out of the enclosure. Keep it close to Kraftor at this stage so that the connecting wires are not pulled or strained.

Kraftor display assembly lifted while its wires remain connected
Lift the display carefully while its wires are still connected.

4. Disconnect the display

Disconnect the display assembly from the main PCB. The Grove connector has a small locking tab: press and hold the tab to release the connector, then pull the connector straight out—never pull on the wires.

Kraftor display assembly disconnected from the main PCB
Disconnect the display assembly and set it aside.

5. Remove the four PCB screws

Remove the four screws securing the Kraftor main PCB. Keep the screws together for reassembly. Their locations are circled in the photo below.

The four screws securing the Kraftor main PCB are highlighted
Remove the four highlighted screws.

6. Move the main PCB away from the rear panel

Carefully slide the PCB away from the rear panel and lift it only as far as necessary to reach its underside. Avoid putting stress on the sockets, controls or remaining wiring.

Sliding the Kraftor main PCB away from the rear panel
Slide the PCB away from the rear panel to access its underside.

7. Position and solder the FRAM module

Locate the FRAM footprint on the underside of the Kraftor PCB. Position the FRAM 1.0 module exactly as shown, with the module aligned to the footprint and sitting flat against the PCB.

Close-up of the FRAM 1.0 retrofit module
The FRAM 1.0 retrofit module.

Solder the module to the matching pads on the Kraftor PCB. Use only enough solder to make clean joints, and check carefully for bridges between adjacent pads before reassembly.

FRAM 1.0 module soldered to the underside of the Kraftor main PCB
Correct position of the FRAM module on the underside of the Kraftor PCB.

8. Reassemble Kraftor

  1. Return the main PCB to its original position and reinstall the four screws.
  2. Reconnect the display exactly as it was before, then place the display assembly back in the enclosure. (You will need to push the wires under the PCB)
  3. Reinstall the speech board, if one was fitted.
  4. Refit the top cover and make sure both sides clip into place.

Reconnect Kraftor and check that it starts and operates normally. If it does not, disconnect it immediately and inspect the FRAM orientation, solder joints, connectors and wiring before trying again.


SAM for Emy : now with Keyboard support

Check this page for more : https://www.polaxis.be/product/sam-firmware/


Connect a USB keyboard and select Keyboard from the main menu.

  • Type text directly from the USB keyboard.
  • Press Enter to speak the current sentence with the current SAM settings.
  • Press Escape to clear the text buffer.
  • Use Backspace and Delete to edit the text.
  • Use the cursor keys to move inside the text.
  • Press Tab to append the current sentence to keyboard.txt on the SD card.


Talko Terminal

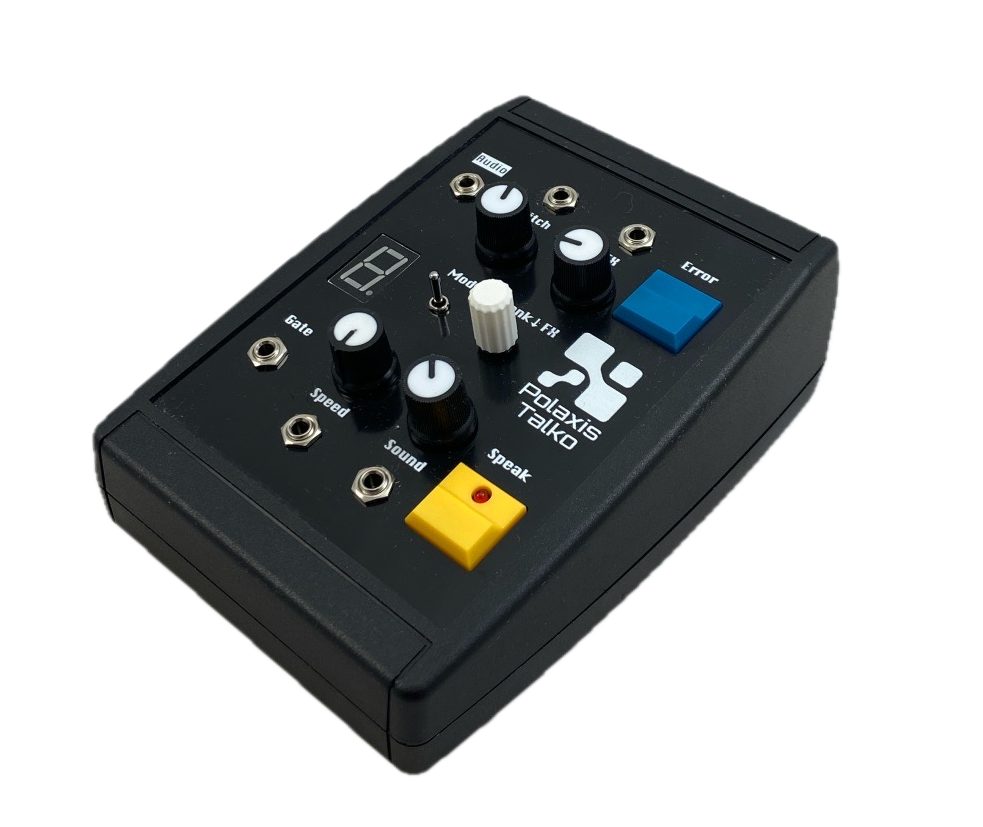
Talko Terminal is here.

After the success of Emy in the Terminal desktop format, Talko now comes in the same proven enclosure.

Inside, it’s the full Talko Eurorack module, offered as a standalone tabletop unit — USB-powered, compact, and perfect for anyone who wants Talko without a rack.

It runs the complete Talko2 engine: numbers, alphabets, phonemes, classic phrase banks, real-time pitch and speed control, plus the new Error mode for continuous glitch textures.

A 7-segment display shows the active bank or effect.

Talko Terminal includes a USB-C port for power, serial communication, and UF2 drag-and-drop firmware updates, making hacking and experimentation easy.

A key advantage over the Bricky version: you get direct USB access, so there’s no need to open the case to communicate with Talko or flash new firmware.


Aria Vowel generator

Aria Firmware – A Vowel Synth for Emy & Terminal 🎶🔊

Unlock new vocal textures with Aria, a playful and expressive vowel generator for your Emy or Terminal module.
Whether you’re crafting robotic chants, abstract soundscapes, or vocal-like modulations, Aria brings a fresh dimension to your synth setup.

✨ Key Features:

✔ Three Modes – Trigger, Gate, and Continuous for flexible control

✔ Smooth Transitions – Adjust merge duration for seamless morphing

✔ Customizable Parameters – Sample rate, pitch, noise level & more

✔ Easy Installation – Load via SD card and switch firmware effortlessly

📥 Get Aria now for just €4.99 – includes future updates!

🔗 Add to Basket

View this post on Instagram


How to update or load a firmware on Kraftor ?


  • Open the plastic case by gently squeezing the top part and lifting it while holding the lower part.
  • Install your voice board
  • Connect Kraftor to your computer via USB.
  • Double-click on the reset button
  • A new drive named “KraftoBOOT” will show up on your computer, and the MIDI LED will start to glow gently
  • Drag the firmware ending with “.UF2” to the “KraftoBOOT” drive
  • Done! : Kraftor will restart using the newly installed firmware

Kraftor uploader

If you just want to update the firmware without changing the voice board, you can also do everything remotely via USB without opening the case.
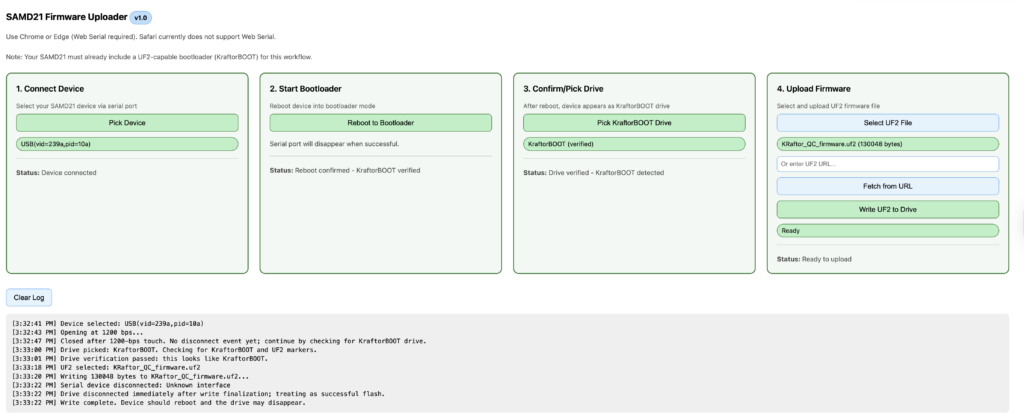
Use this small utility in your browser : 

You can run the utility one line here  https://deladriere.github.io/samd21_UF2_uploader/

or access the source code here :


Nexus firmware update

2 new exciting firmware Updates for Nexus!

Enhanced MIDI Functionality:

  • Text and Phoneme via MIDI: Send text or phonemes directly through MIDI.
  • Sequencer Integration: Pre-store phoneme or text sequences in your piano roll. Add a “Speak” note at the end to activate speech.
  • MIDI controls to adjust your Nexus device’s speech characteristics in realtime
  • 20k Word Library: Access a vast collection of pre-made MIDI words, ready to drag and drop into your favorite sequencer.

Phoneme Mode:

  • Simplified Selection: Easily choose from essential phoneme groups like “Vowels” and “Consonants.”
  • User-Friendly Controls: Straightforward pitch and speed adjustments, perfect for beginners in speech synthesis.
  • Simple Activation: Get started with just a gate signal.


Sino vox : now with keyboard input

Two updates to the Sino vox firmware :

  1. update : in  the number function, it is now possible to trigger the speech from the main button
  2. new: keyboard mode

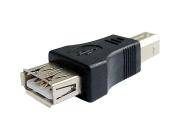
Connect a USB keyboard to the USB port using the gender changer adapter.

Do not use this port to power something apart from a standard keyboard.
The maximum current that can be provided is 300 mA.

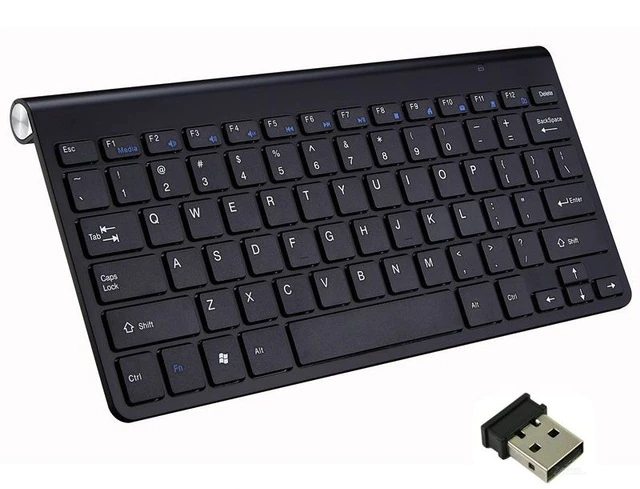
I you need a keyboard, check out this Wireless Keyboard.

Keyboard


​Text Operation:

Type the text and press Enter to start the speech. (The Function button is also active)
Use the Backspace to delete the last character.
Use Escape to erase the string and start over.

Use the five potentiometers to alter the Speed, Voice, Pitch, Volume, and Language (Pinyin or English)

The busy signal goes up while a key is pressed. (if you want to trigger external sounds, for example)

Firmware

more info in the user manual