Using Nexus Vox with your prefered microcontroller
Raspberry Pi Pico
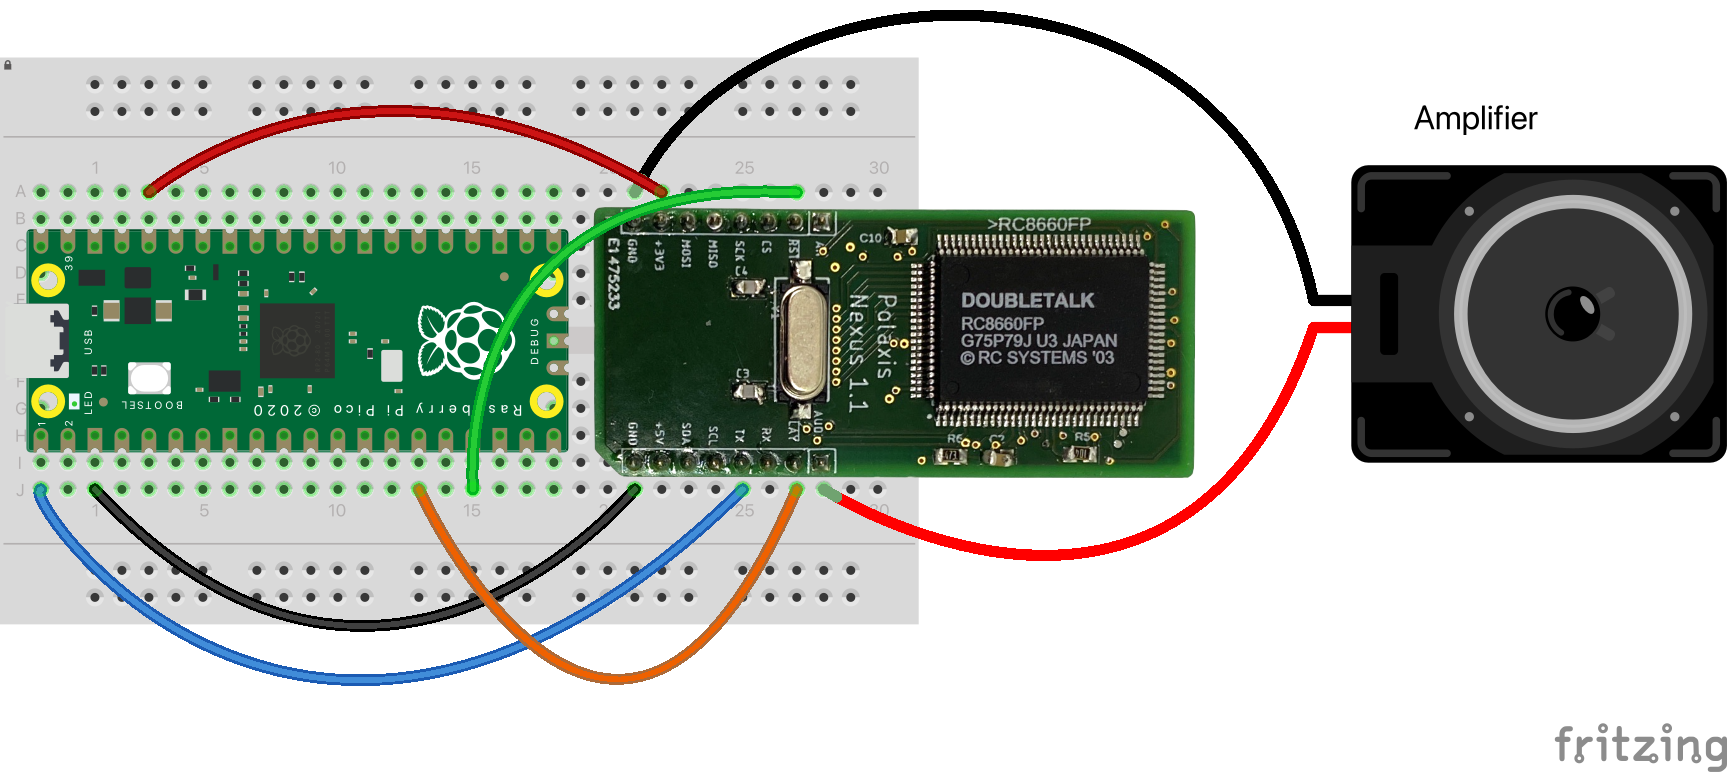
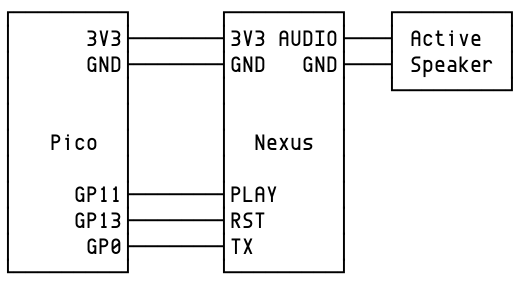
Getting started with Nexus is easier than you might think: all you need is a basic serial connection and two optional pins!
Please note that the TX pin connects to the TX pin on the microcontroller as well.
With just a few lines of code, you can bring the voices of characters like ‘Perfect Paul’ and ‘Vader’ to life, all through a simple setup.
Her is an example showing how to configure a Raspberry Pi Pico to communicate seamlessly with Nexus and explore its full potential.
#include <Arduino.h>
#include
auto &Nexus = Serial1;

#define RST 13  // Reset pin (active LOW)
#define PLAY 11 // Busy Speaking pin

String voiceLabel[11] = {"Perfect Paul", "Vader", "Big Bob", "Precise Pete", "Ricochet Randy", "Biff", "Skip",
                         "Robo Robert", "Goliath", "Alvin", "Gretchen"};

// Turn on the BUILTIN LED when speaking
void Talking(void)
{
  digitalWrite(LED_BUILTIN, digitalRead(PLAY));
}

void setup()
{
  // initialize pins
  pinMode(RST, OUTPUT);
  pinMode(PLAY, INPUT_PULLUP);
  pinMode(LED_BUILTIN, OUTPUT);

  attachInterrupt(digitalPinToInterrupt(PLAY), Talking, CHANGE);

  // Reset Nexus
  digitalWrite(RST, LOW);
  delay(2);
  digitalWrite(RST, HIGH);
  // Stabilize Audio
  delay(1000);

  // Initialize Nexus
  Nexus.begin(115200);
  Nexus.println("Anything to sample the baud rate");
  delay(100);
  // Set control command to \a
  Nexus.write(0x1);
  Nexus.write(0x07);
  Nexus.println("\a8S Welcome, to the machine."); // Ajust speed
  delay(1000);
}

void loop()
{
  for (int i = 0; i < 11; i++)
  {

    // Construct the control sequence for the voice change dynamically
    Nexus.print("\a"); // Start with the control character
    Nexus.print(i);    // Append the voice number dynamically
    Nexus.print("o");  // Add the 'o' to control the voice

    // Now print the message with the dynamically set voice
    Nexus.print(" Hello, my name is ");
    Nexus.print(voiceLabel[i]);
    Nexus.println(".");

    delay(3000);
  }
}