Talko Eurorack countdown timer

Here is a little countdown timer I developed for Hataken to help in timing mini gigs.

It work like this :

  1. Choose the amount of time from 0 to 19 minutes with the BANK knob.
  2. Start the timer with a gate signal  or by pressing the rotary switch.
  3. The display will countdown and  blink once per second until the end of the timer.
  4. A the end of the timer, the BEND  signal will go high (4.5V max, if  the BEND knob is fully turned clockwise) and the alarm will ring if the bend  switch is ON

While running you can :

  • Run silently (mode switch UP),
  • Tick every second (mode switch NEUTRAL),
  • Tick  and have the minutes left spoken (mode switch DOWN).
  • Use the BEND switch to set or mute the alarm sound
  • Stop the timer by pressing the rotary switch (or using a Gate signal to do so)

Note : The SOUND and BEND pots are not used

Here is how it sounds like :


The code is available here : talko_timer_Hataken.hex

Right click to save it as a .hex file and use Easy uploader to install it into Talko.
The next iteration will have an interface with Processing to display the countdown on a big display.


3 new sounds banks for Talko

Talko’s code has been updated with 3 new sounds banks :

Bank 15 : French Vowels Male (5)


Bank 16 : English voiced allophones (72)

Bank 17 : VCO friendly voiced allophones (25)

This bank is a selection of allophones from bank 16 that produces nice looping sounds in VCO mode (great for mouth drumming for example)

The new code is available here
and can be uploaded with Easy uploader as described on the downloads page.

The updated manual is to be found here.

Have fun !


Talko as Ginkosynthese Grains

Both Talko 1.1 & 1.2 share some hardware with the Ginkosynthese Grains.

The Grains is also an Arduino module (based on the famous Audino code from Peter Knight) with the 3 first analogues port being used to manipulate the sound

Talko grains

Talko can also do this and the Grains code need just to be tweaked a bit to get the output on pin 3 (very easy to do)

I tested a few examples found here:
http://www.ginkosynthese.com/product/grains/

I uploaded some example on the Github and also posted their compiled firmware here so can be uploaded directly using EasyUploader :


fresh.hex

TALKO 1.1 control
Sound : sample offset
Pitch : loop length
Speed : pitch

TALKO 1.2 control
Pitch : sample offset
Speed : loop length
Bend : pitch


hrtl-cereals-V2

TALKO 1.1 control
Sound : sample start
Pitch : grain size
Speed : pitch

TALKO 1.2 control
Pitch : sample start
Speed : grain size
Bend : pitch


jgb-patternrain-v2

TALKO 1.1 control
Gate : clock in
Sound : select pattern
Pitch : select bank for patterns
Speed : stop/reset and then pattern rotate (to be able to make it fit better to other parts of your music)

TALKO 1.2 control
Gate : clock in
Pitch : select pattern
Speed : select bank for patterns
Bend : stop/reset and then pattern rotate (to be able to make it fit better to other parts of your music)


jgb-RZ1-drums

TALKO 1.1 control
Sound : Pitch CV 0-5 V
Pitch : Play on / off. Set it to max for normal function
Speed : SAMPLE_SELECT between two wavetables 0-5 V

TALKO 1.2 control
Pitch : Pitch CV 0-5 V
Speed : Play on / off. Set it to max for normal function
Bend : SAMPLE_SELECT between two wavetables 0-5 V

If you would like to adapt other Grains code, just let me know so I can post there here too.


Talko 1.2 now available

IMG_5620-copie.jpg
Talko 1.2 are now in stock, both as kits and as assembled modules.

What’s new in version 1.2

  • Rotary encoder for smoother Bank change
  • Encoder’s button can be pressed to simulate the gate signal going HIGH and make the module speak.
  • Mode selection via a 3 positions switch : Speech – Repeat – VCO
  • Growling mode in VCO (turn the Bend pot fully CCW)

Talko-New-panel.png

My first patches

Beyond having it to speak and bending it in (the obvious) Speech mode, I would recommend testing the Repeat mode by feeding some rhythmic pattern into the Gate entry and particularly playing with the Gate length.

Another fun one is to set it to Bank 0, VCO mode, turn the Bend pot fully CCW for growling mode and then play with the Sound, Pitch and Speed pots.

Try also to press the rotary button while the Sound entry is being sequenced in VCO mode to hold notes on and manually alter the sequence.
Do you have a nice patch to recommend ?
Thanks in advance for sharing


EasyUploader

I met Paul Soulsby at Superbooth16 in Berlin, earlier this month.
Paul has developed an amazing piece of hardware based on the ATmega328P: The Amagatron

Paul also developed a software to allow applying code without the hassle of using the Arduino IDE, installing libraries and compiling code : EasyUploader

Paul made a special version that supports the reset timing that Talko requires.

So have a look on the Downloads page to see how simple it is now to apply new versions of  code to Talko.

EasyUploader is really … easy to use and works both on Mac & Windows.

EasyUploader


Talko 1.2 is coming soon

Talko is an open source Arduino based LPC speech synthesizer. It’s firmware can be updated via the onboard USB port, using the standard Arduino IDE.

In Speech mode, the speech starts with a gate signal and complete before waiting for a new gate signal. The speech has the priority.

In Repeat mode, the speech starts and stops with the gate signal going high or low. The gate has the priority and the speech repeats while the gate is high. This mode is very useful to create crazy rhythms.

In VCO mode, the LPC engine loops while the gate is high, producing steady notes.

The VCO mode can also produce sounds using white noise instead of tones, making strange throat like sounds.

The sound synthesis can be is driven via CV signals or knobs to choose sounds and alter pitch, speed & bending.

Talko1.2

flyer1.2.pdf


LPC encoding for the Arduino’s Talkie library

Adding new sounds or vocabulary for the Talkie library is not straightforward and I needed a checklist to smoothen the process.
Here are the main steps :

Recording audio with Audacity

  • The recording has to be made at 8 kHz with 16-bit depth
  • Export to Wav signed 16-bit PCM(note that you can also use Audacity to re-sample the audio to 8000 kHz via the [track/re-sample] menu)

Converting sounds using SoX

Alternatively, you can also convert various audio format to 16 bits 8 kHz with SoX, using the following command:

sox audiodump.wav -r8000 -b16 audio-8k.wav

Coding with QBOX pro

QboxPro was made to code sounds for the venerable TMS5220 chip that Talkie library is emulating.

It runs only on an ancient system like Window XP or older

[fac_icon icon=”exclamation-triangle” color=”#dd3333″]Note: it seems that QBOX doesn’t like when the audio starts immediately. In that case the compressed audio is totally inaudible, so adding a little pause before the sound starts helps a lot

Installation

Get the software here : ftp://ftp.whtech.com/pc%20utilities/qboxpro.zip

Don’t forget to install QBOX at the root of the disk : c:\QBOX and to move the QBOXPRO.ini file to c:\WINDOWS

Coding

The process of coding has already been described in detail here : http://furrtek.free.fr/index.php?a=speakandspell&ss=9&i=2

The process goes like this:

  • Create a new project using the following project parameters : Byte / 8 Khz / 5220 coding table
  • Goto Project and add the audio file
  • Choose process using : medium bit rate and pressing OK
  • Edit concatenation : insert concatenation after by adding a name; then insert phrase and press ok
  • Format it by choosing the first line in the format menu : LPC 10V, 4UV

Arduino code

Recuperate the .bin file that Qboxpro has generated This file contains the LPC stream and need to be translated into C++

I use this small Python script to convert the .bin

import binascii
fname="SOUND.BIN"
f = open(fname, "rb")
#print "{",
code ="const uint8_t sp"+ fname[:-4]+"[] PROGMEM ={"
try:
    byte = f.read(1)
    while byte != "":
        # Do stuff with byte.
        byte = f.read(1)
        code = code + "0x"+(binascii.hexlify(byte)) +","
        #print "0x"+(binascii.hexlify(byte))+" ,",

finally:
    f.close()
    code = code[:-4]
    code = code +"};"
    print code
    print
    print("voice.say(sp"+fname[:-4]+");")

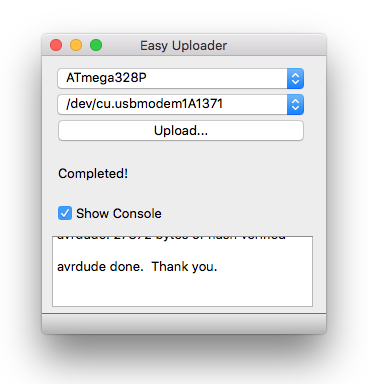
Simply paste the script’s outputs at their respective places into the Arduino code and upload

Here is an example I generated with the Mac’s say command (note the 0.3-second silent before the speech starts)[edit : it’s fine with 0.1 too]

say -v"Yannick" "[[slnc 300]] Wir sind die Roboter" -r 100 -o roboter.wave

then I converted to the appropriate format using SoX

sox roboter.wave -r 8k -b16 roboter.wav

After the QBOXpro coding and the Python converting, I copied these lines into the Arduino IDE

// copy this part before the setup() section

const uint8_t spROBOTER [] PROGMEM ={0x00,0x00,0x00,0x00,0x00,0x00,0x00,0x00,0x00,0x00,0x00,0x00,0x80,0x4a,0x6a,0xca,0xac,0x2a,0x26,0x29,0x79,0x50,0xf1,0xae,0x88,0xae,0xb4,0x2a,0x54,0x33,0x5a,0x87,0x36,0x4b,0x65,0x35,0x8b,0xd3,0xba,0xe6,0x43,0x45,0x44,0x49,0xe9,0x86,0x32,0x61,0x92,0x24,0xad,0x1c,0x36,0x04,0x45,0xe3,0xb6,0x62,0x58,0x25,0xb1,0x58,0x72,0x8a,0x69,0x14,0x25,0x72,0xf1,0x29,0x36,0x17,0x92,0xaa,0x59,0xab,0x58,0x9c,0x28,0xab,0x26,0x9d,0x62,0x71,0x26,0xaf,0x9e,0x74,0xf2,0xc5,0x85,0xac,0x6a,0xf6,0xc9,0x97,0x56,0x94,0xaa,0xc5,0x27,0x9b,0xde,0x50,0x33,0x67,0x9f,0x6c,0x18,0x43,0xcb,0x5c,0x7c,0xb2,0xa2,0x44,0xba,0x6a,0xf2,0xc9,0xaa,0x32,0xce,0xac,0x39,0x27,0x2b,0xc6,0x24,0x63,0xaa,0x9c,0xbc,0xc9,0x60,0x97,0x9c,0x7d,0x8a,0xca,0x52,0x5c,0x62,0x76,0xab,0x0a,0x4b,0x51,0xf3,0xc9,0xa5,0xae,0x2c,0x45,0x34,0x1a,0xa7,0xaa,0x53,0x57,0x25,0x8f,0x5b,0xca,0x6e,0x42,0x44,0xd4,0x4e,0xc9,0x3b,0x77,0x31,0xf1,0xd4,0xa5,0xae,0x32,0xc9,0xd4,0x6b,0x9f,0x21,0xab,0xc0,0xcc,0x28,0x7d,0x8a,0xa2,0x1d,0x33,0x62,0xf4,0x29,0x9b,0x0c,0xcc,0xf0,0xd1,0xa7,0xec,0x2a,0xd1,0xdd,0x46,0x9f,0xb2,0xeb,0xc0,0x30,0x1b,0x73,0xca,0xae,0x83,0x42,0x6c,0xcc,0xa8,0xab,0x12,0x09,0xec,0xaa,0xad,0xac,0x92,0x64,0xdc,0x67,0x97,0xaa,0x28,0xe8,0xf0,0x72,0x93,0xaa,0x2c,0x61,0x22,0x53,0x75,0x69,0xa2,0xc4,0x69,0x0b,0xd7,0xa1,0xb1,0x92,0x37,0xad,0x1c,0xb9,0xc6,0x73,0xcd,0x2c,0x4f,0xd2,0x9a,0x11,0x5c,0x29,0x42,0x6c,0xa9,0x9b,0x22,0x76,0xaf,0xca,0xa3,0x1a,0x9c,0x28,0xaa,0x27,0xaf,0x6a,0x49,0x26,0xcd,0x9e,0x73,0xea,0x65,0x04,0x39,0x6b,0xf6,0xa9,0xa7,0x57,0xe4,0xa8,0xd9,0xa7,0x1a,0x41,0x48,0x23,0x97,0x9c,0xba,0x1b,0x66,0x8b,0x5a,0x7c,0x9a,0x2a,0xdc,0xc4,0x62,0x4e,0x00,0xb4,0x4e,0x71,0x40,0xf0,0x49,0x0a,0x48,0x6a,0x4d,0x00,0x96,0x8d,0x0b,0x40,0xf8,0x15,0x05,0x88,0x69,0xb4,0xaa,0x90,0x36,0x45,0x6d,0xf2,0x29,0x43,0xee,0x12,0xf1,0xc9,0xa7,0x0c,0x75,0x8c,0x3d,0x6b,0x9d,0x32,0xe4,0x75,0xcc,0x8e,0x7c,0x8a,0x18,0x36,0x31,0xb3,0xf2,0xca,0x83,0x9e,0x26,0x8d,0x99,0xa9,0xf0,0x66,0x0b,0xd3,0x43,0xab,0x82,0x85,0x4a,0x61,0x8b,0x45,0x32,0x66,0xd3,0x5d,0x35,0x4e,0xaa,0x07,0x77,0xd7,0x0a,0x2b,0xad,0x9f,0x54,0xc3,0x33,0xe2,0x84,0x3a,0xf1,0x2a,0x55,0x89,0xb5,0xd2,0xe0,0xd6,0xd9,0x62,0xe2,0xc9,0x43,0x59,0x63,0xcb,0x51,0x27,0x8f,0x79,0x52,0xc4,0x6f,0x9d,0x3c,0xa6,0x4a,0xd5,0x98,0x72,0xb2,0x14,0xca,0x4c,0x7d,0xd1,0x49,0x53,0x28,0x75,0xc9,0xda,0x2d,0x0d,0x31,0xd4,0x25,0xab,0x10,0x80,0x26,0x4b,0x02,0x48,0x6f,0xc1,0xf2,0x6a,0xcd,0x45,0x54,0x6a,0x4b,0xba,0xf5,0xaa,0xd2,0xc4,0xa3,0x99,0x32,0x35,0x3c,0xea,0x8c,0xb1,0xab,0x64,0xb7,0xa8,0x7c,0xb6,0xa2,0x4d,0xca,0xab,0xf4,0xe9,0x8a,0x56,0x2b,0xcd,0xc1,0xa7,0x2f,0xc1,0xd4,0xad,0xcb,0x9c,0xbe,0x04,0x73,0xd7,0xac,0x7c,0xc6,0x92,0xdd,0x5d,0x72,0xce,0x19,0x4b,0x4c,0x0b,0xf5,0x39,0xa7,0x2f,0x21,0x3c,0x34,0xe6,0x9c,0xa5,0xf8,0x88,0x94,0x5c,0x72,0x8e,0xea,0xc2,0x4b,0x6d,0xc9,0x59,0xaa,0x4b,0x2f,0xd5,0x26,0x67,0xad,0x2e,0xbd,0x54,0xd7,0x9e,0xb3,0xba,0xf2,0x52,0x5d,0x73,0xba,0x6a,0xca,0x4a,0x75,0xcd,0x59,0xaa,0x6b,0x2b,0x91,0x35,0xa9,0xca,0x69,0x28,0xdc,0x67,0x91,0x2a,0xe4,0xd4,0xd2,0xae,0x88,0xaa,0xe0,0xc7,0xdc,0xb2,0x01,0xaa,0x82,0xc8,0x2c,0x33,0xdb,0x00,0x00,0x00,0x00,0x00,0x00,0x00,0x00,0x00,0x0f};

// copy this code in the main loop
voice.say(spROBOTER);

and here is how it sounds:


Online Store

Polaxis has now an online shop : Please visit this page to grab my latest modules assembled or as DIY kits

talko (2)


Talko

” Have your modular speak out the CV “

Intro

This module is performing realtime lpc synthesis and uses no sampling to produce intelligible voice or … not if you choose to.

This module is developed with the help of the Muffwiggler community : LPC speech synth module

Technical details

– format: eurorack
– width: 10hp
– depth: 30 mm skiff friendly
– power: + 12V: 65 ma
– audio : un-filtered 5V PWM carrier at 62500 Hz

Functions

Bank Pot

For the moment it can process 12 sound banks or functions  :

0: digits (from 0 to 9) male voice
1: digits (from 0 to 9) female voice
2: spell the alphabet
3: nato alphabet
4: vocabulary
5: big numbers
6: voltmeter (reading the CV voltage)
7: frequency meter (just saying “Hertz” instead of “Volts”)
8: counter (each gate trigger increments the counter while any cv change on the Sound entry resets it)
9: number radio (each gate trigger a 4 number sequence while any change on the Sound entry  trigger a new “transmission”)
10: time since cv reset (each gate triggers saying the time in minutes/seconds while any cv change  on the Sound entry resets the clock to zero)
11: Random vocabulary
12: Sentences :

– s0 : “set the control for the start of the one”
– S1: “C time slow”
– S2: “start the fire
– S3: “smoke the circuit”
– S4: “turn past the time”
– S5: “stop the machine”
– S6: “too_low for you”
– S7: “fire and ice”
– S8: “heavy machine”
– S9: “new ground circuit”
– S10: “repair the machine”

Changing Banks in trigger mode seems unresponsive because the change occurs only when the current speaking finishes.

Hardware

Sound jack & pot

CV signal in allow to choose the words or phrases to be said. Resets counter in bank N°8 and start a new transmission in Bank 9

Gate jack

Level high start the complete sound in trigger mode. (regardless of it’s length)
If the trigger switch is off, the gate will start the sound and hold it as long as the gate level stays up. Very useful to create crazy rhythms.

It needs a gate signal to produce any sound ! No gate= no sound

Trigger Switch

Choose between trigger mode or loop mode.
In trigger mode the speech has the priority and will complete before starting again on the new signal gate going high.
In loop mode the gate has the priority and the speech can be shopped by a low gate level or can be looped with a high gate level.

Bend Switch

If bend is on, the bend pot … well, distords the sound.

Speed jack & pot

Change the speed of the voice

Pitch jack & pot

Change the pitch of the voice

Bend jack & pot

Change the amount of bending

Please note that building & coding this module requires minimum Arduino knowledge like installing a com port, installing libraries & uploading code.

 Build instructions and source files


Secure payment

Secure payment

Our secure payment

With SSL

Using Visa/Mastercard/Paypal

About this service